
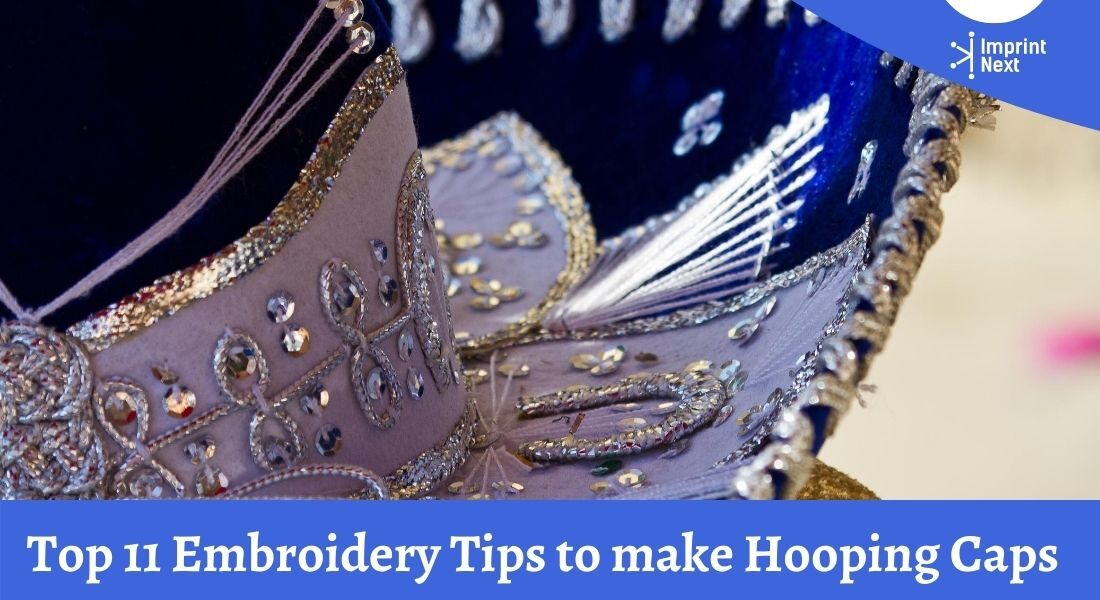
Top 11 Embroidery Tips to make Hooping Caps
![]() |
1647
/
|
1647
/
Last Updated on: 4th April 2024, 09:23 am
Embroidery caps on commercial embroidery machines can be difficult and stressful. That can only be possible if you follow certain steps, to prepare to work under an embroidery machine.
They are:
1. Preparing the Cap
2. Slide the Cap Frame
3. Slide the Prepared Cap into the frame
4. Press Down on the Bill
5. Swing the Strap over the brim
6. Bring the strap down
7. Hook on the strap
8. Tighten the Cap Frame
9. Smoothen lower part
10. Orient the Clip Handles
11. Final Step
In their form and way, most of the cap styles are unique. Here, let’s take various cap styles and ways of hooking them, as well as various types of cap frames available.
Materials from thick wool to light nylon can be produced out of caps. Buckram is the material on the front of the hat and can be soft and flexible, or feel like a heavy line of fish.
Want to Boost Your Print Shop Revenue?
Schedule a free consultation
The seam ties the buckram with the rest of the cap between these separate sections. Some caps may be challenging, so it is essential to practice.
The objective is to hold the cap so tightly that the front panel remains low to the needle plate for the best stick.
The guide demonstrates how to mount a cap using a wide-angle cap base.

Do you have printers? Are those printers sitting idle?
Become a Print-on-Demand dropshipping app like Printful or Printify. Dropship your merchants' orders.
Unlimited Merchant stores. Dropship and Fulfil Merchants' orders. Manage merchant invoice, sales commission, etc. Merchants sell the designed products in shopify, etsy stores, etc.
Know more1. Preparing the Cap:
To ease the hooping process, first prepare the cap that you want to hoop.
Remove any cardboard from the inside and straighten the bill as much as possible.
Next, hold the sweatband and pull it out. Outside of the cap.
It may be sewn into the cap near the back, so it may need to be folded a bit to fit in the frame.
2. Slide the Cap Frame:
Drag the cap frame to the cap gauge. Open the metal belt. Please notice there could be two clips on some wide-angle cap sets.
Place a slice of the cap on top of the scope and teeth of the container. Ensure a long enough backing to support the entire area of the stick. A length of 16 inches is enough for most wide-angle cap frames.
3. Slide the Prepared Cap into the frame:
Slide the prepared cap onto the cap frame and inside the cap. The bill should be pushed into the frame against the bill stop and relatively focused.
For good usage may be made of the centering mark on the countertop. Towards each side of the camera, the cap will travel over both clip points.
Boston based custom slide sandal maker has become $10 Million company using an online designer and unique growth marketing.
Read more4. Press Down on the Bill:
Press the bill to make sure it falls into the cap-frame bill trough of the cap. It will help prevent the shell from slipping or from moving out from the casing.
Pull the side of the sweatband downwards toward the cap frame and lighten any sweat or sweatband on the sides. You might need to fold a little of the sweatband to stop the pin. See the backup to make sure it remains.
5. Swing the Strap over the brim:
If the left-hand side is within the strap hinge, move up and over the bottom of the bag.
The teeth of the sweatband should be on the side just above the seam on the cap.
6. Bring the strap down:
In order to put the strap’s teeth into the bill’s seam, bring the sap around the cap front.
Bring the strap down
the other side of the cap and ensure the teeth fall just above the stitching attaching the sweatband.
7. Hook on the strap:
First, make a hook around the latch and strap it into the hook.
You may need to fold or adjust the sweatband slightly to accommodate the hook and latch.
At this point, you should hook the latch, but not close it.
8. Tighten the Cap Frame:
Whether it doesn’t suit the cap snugly or release it, whether the cap structure band is too hard to secure properly.
This is only appropriate when the frame is first used for hooping a particular cap type.
9. Smoothen lower part:
Keeping the bucket closed, smoothen the lower part of the cap.
It should be tight.
10. Orient the Clip Handles:
While pressing the cap material around the post, secure the material by using the clip to it.. Orient the clip handles toward the back of the cap.
Some wide-angle cap frames are available that holds differently the back of the cap.
It is necessary to use clips while sewing. If the sides of the cap is unstructured.
11. Final Step:
Now, it is time to remove the cap frame from the gauge.
Then, place it on a wide-angle driver on the embroidery machine.
Conclusion:
There are various types of cap frames that differ from each other. That offers distinct advantages compared to the wide-angle type.
For instance, the conventional cap frame holds the front of the cap from multiple locations, thus minimizing cap movement.
However, you can perform embroidery on the cap’s front panel.
Do you have printers? Are those printers sitting idle?
Become a Print-on-Demand dropshipping app like Printful or Printify. Dropship your merchants' orders.
Know moreMost Popular
-
 How To Start A Clothing Line Business Of Your Own?
-
How Much Should You Price Your Embroidery Work?
-
Top 10 Best Commercial Embroidery Machines For 2024
-
Top 10 DTG Printers in 2024 with Price for Print Business
-
Top 20 Wholesale Blank T-shirt Suppliers in USA
-
7 Licenses and Permits Required to Start a Clothing Line Business in USA


