
How to Start for a Screen Printing Job? Follow These 06 Steps
|
2769
/
Last Updated on: 11th November 2024, 04:31 pm
Screen printing, as we know, needs a lot of skill and practice. And it is not that you can directly place the garment under the screen, slide the squeegee, and print it out.
It involves a lot of procedures to follow before starting a screen printing work on the garment. Here we are going to discuss all that.
Before starting a screen printing job, you need to go through several steps to print a garment.
The six steps you must follow before you start a screen printing job so that you can achieve a great print:
Want to Boost Your Print Shop Revenue?
Schedule a free consultation
1. Use a dense film
2. Select a correct mesh
3. Tight Screen Mesh
4. Correct Stencil thickness
5. Maintain sharp squeegees
6. Pallet built-in rubber material
Top 6 Preparation Steps to Follow Before Screen Printing:
1. Use a dense film:
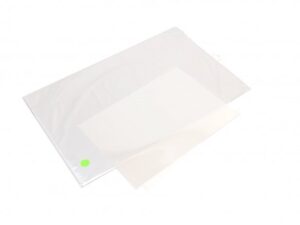
Dense film is one of the most important pre-press items to prepare before screen printing. When you hold the film up to a strong light, does it show through the dark, positive areas?

Do you have printers? Are those printers sitting idle?
Become a Print-on-Demand dropshipping app like Printful or Printify. Dropship your merchants' orders.
Unlimited Merchant stores. Dropship and Fulfil Merchants' orders. Manage merchant invoice, sales commission, etc. Merchants sell the designed products in shopify, etsy stores, etc.
Know moreNo light can penetrate a perfect universe. Although a tiny amount of light produces good outcomes, this is not the ideal case.
Many shops use pure photopolymer emulsion. But if your film is not super opaque, you may have to underexpose your image because the emulsion is so sensitive that it sees a small amount of light showing through where it shouldn’t.
To get a decent image, cut back the amount of light so that the resulting image is satisfactory, given the circumstances.
The emulsion will not get adequate light and will fail during the manufacturing cycle by underexposing the film to account for it.
You also may find that tiny pinholes can be seen from the dust and dirt particles that probably would have been exposed away if the screen received enough light.
2. Select Correct Mesh:
Take a while to look at an image film and pick the right mesh for the job. The ideal mesh count would not be so high that a double or low pass would be needed that fine details were lost.
Boston based custom slide sandal maker has become $10 Million company using an online designer and unique growth marketing.
Read moreScreen printing presses that can take around 3,000-4,000 or more shirts per day. Keeping these machines “fed” and running smoothly is critical.
Imagine having to do 80,000 prints every 24 hours; it can’t be achieved if you don’t select the best mesh for a particular design.
Too fine a mail would indicate that a harder squeegee or double stroke is needed to either reconstruct the screen with a more transparent mesh.
Regardless, it’ll cost time and money, so selecting the correct mesh the first time is critical.
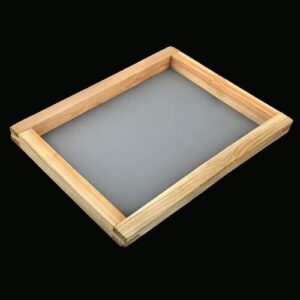
3. Tight Screen Mesh:
While the right mesh count is important, close mesh tension is equally critical. The near mesh panel may be an accurate print output indicator of a store.
The mesh opening is the key. Mesh selection is instrumental in determining the mesh opening, but a tighter mesh has a larger opening. Imagine a rubber band; the further you stretch it, the thinner it gets.
The same occurs when glass-mesh fibers are correctly extended, thinner, and the panel mesh is removed to allow ink to flow easier.
Imagine cutting cheese with a large, old, and loose wire; it is even tougher than a small, strong wire. Now worry about taking a cheese slice every 4 seconds with a loose wire.
This also would be very difficult, but it would be much easier with a tight wire. Tight screen mesh functions the same way.
Large shops know this and make it standard practice to maintain their mesh tensions. Doing so can make a job profitable to varying degrees.
We’re talking about the difference between a car payment or a house payment when you do this well for some time, maybe even a second house allowance.
Also, the tighter the mesh, the less pressure is required for the squeegee to transfer ink onto the substrate.
Additionally, the amount of off-contact needed with a properly stretched screen is far less, and the overall quality will show.
4. Correct Stencil thickness:
Have you ever felt a screen? Doing so enables you to gauge mesh tightness and emulsion thickness. I do this when I visit shops because it gives me an idea of what type of shop or work I’m encountering.
Why?
The amount of required ink on a print can easily be managed by emulsion. You only need to add a little emulsion on the screen if you like a little tin deposit.
Are the screen meshes at least in the same ballpark concerning tightness, and is there some emulsion gasket?
The larger the emulsion gasket, the larger the accumulation of blood. It’s really shocking when I see someone prepare to coat screens properly, then at the last minute to brush all of the extra emulsion too carefully.
Also read: How to Screen Printing on Long Sleeves and Pants?
Many screen printers do this to save money, so they think. When printing the design, they think
they need to double pass the squeegee to get some opacity from the ink.
However, this extra step potentially could have been avoided if they would have left the
emulsion on the screen.
The amount of required ink on a print can easily be managed by emulsion. You only need to add a little emulsion on the screen if you like a little tin deposit.
The thicker the emulsion, the more ink that can be deposited. However, let’s talk about surface area. If you have a very fine dot and are using a 280 mesh, for example, think about that dot’s surface area and emulsion.
If the dot size’s surface area is smaller than that of the emulsion side of the dot, then the deposited ink will try to stay on the screen instead of on the shirt. Also, if your screen isn’t as tight as possible, then the screen mesh’s surface area will also hinder the ink deposit.
5. Maintain sharp squeegees:
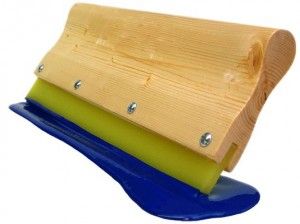
Not all screen printers are efficient in maintaining sharp squeegees. Thus, it becomes difficult to apply ink onto the substrate.
Moreover, sharp squeegees are important. It increases print quality.
For instance, imagine the squeegee passing over the image area. When the squeegee is sharp, it leaves a small ink film on the screen, which allows the deposited ink to release more easily, thus creating a smoother ink deposit and higher-quality print and feel.
However, when the squeegee is dull, it leaves ink on the screen after the application on the substrate.
This ink film can partially hold back the ink being released, which will result in a rougher-feeling print.
The best way to get a smoother print texture is to slow down the print stroke and increase pressure. However, you may compromise with the production speed.
Also read: How to Fix Common Screen Printing Issues?
6. Pallet built-in rubber material:
Apart from pallet maintenance, pallet type is an often overlooked but important printing factor.
I’ve noticed over the years that when I printed on T-shirts, then switched to print on a sweatshirt or even a thicker T-shirt style, the design’s feel and look improved dramatically.
The resulting print on a sweatshirt would be smoother and more opaque. I discovered this was due to the soft layer created by the sweatshirt.
When I was a machine operator, I would notice thin thread or other debris often got stuck on the pallet when printing some halftone or four-color process design.
Those particles also would show up in the finished design, creating a misprint. The debris would need to be removed before printing could commence.
Some machine manufacturers use a type of heat-resistant rubber material on top of the pallet.
Why?
This rubber material improves the print quality. Therefore, it can help smooth the imperfections due to the lint or other things underneath the fabric.
If your pallet is not fixed with a rubber material, you can add a soft rubber pallet sheet. You can get this from any paint supply store.
Moreover, remember to ensure they are the heat-resistant type specifically meant for screen printing.
Also read: 8 Essential Equipment to Start a Screen Printing Business
Conclusion:
As we discussed above, adding the rubber covering prevents heat distortion or warping in wood pallets. If you have an aluminum pallet, it will make the pallet easier to handle when using a flash.
More to say, many prepress details can affect your screen printing results.
You may also evolve new techniques, but, what we discussed above, these are the most important factors for ensuring consistent, quality prints.
Do you have printers? Are those printers sitting idle?
Become a Print-on-Demand dropshipping app like Printful or Printify. Dropship your merchants' orders.
Know moreMost Popular
-
 Top 10 Automatic Screen Printing Machines[Updated]
-
 50 Most Creative T Shirt Design as Inspiration for Your Next Tee!
-
 How Much Should You Price Your Embroidery Work?
-
 Top 20 Wholesale Blank T-shirt Suppliers in USA
-
 Top 10 DTG Printers in 2024 with Price for Print Business
-
 7 Licenses and Permits Required to Start a Clothing Line Business in USA