Last Updated on: 31st October 2024, 08:30 pm
The garment decoration industry encompasses a broad variety of implementation techniques to create the best artwork for printing transfers. Including the usage of several heat transfer systems. When an image is formed on a carrier sheet and moved to a component through a heat press.
A transition takes place. Knowing what’s needed to create works for vinyl cutting, dye sublimation, or printed displays with various forms with transfers will lead to more effective output and boost the outcome.
01. Vinyl Transfers
Configure artwork in vinyl-tapping to clip and plant as quickly and easily as possible—protection of line and spacing thicknesses for the material to be used.
Thicker fabrics, including vinyl glaze or flock, need a thicker line and a broader gap. For standard vinyl heat transfer, 1/16-inch line and distance thicknesses are recommended.
Want to Boost Your Print Shop Revenue?
Schedule a free consultation
The more cavities a design has, the more pulls it will take to weed the vinyl transfer — meaning more production time.
The number of cavities or open spaces in the design also should be considered. The more cavities a design has, the more pulls it will take to weed the transfer — meaning more production time.
Include open areas in the image to prevent the transfer from being too solid and heavy.

Do you have printers? Are those printers sitting idle?
Become a Print-on-Demand dropshipping app like Printful or Printify. Dropship your merchants' orders.
Unlimited Merchant stores. Dropship and Fulfil Merchants' orders. Manage merchant invoice, sales commission, etc. Merchants sell the designed products in shopify, etsy stores, etc.
Know moreThe relation between open areas and minor gaps in lines should minimize the number of pulls required for weeding. An exception to the volume of vinyl used in an image is rare vinyl-like glitter or foil stuff.
In these situations, larger vinyl areas may help to show their unique effects.
If you’re not as concerned about time, then you can play around with the line and spacing thicknesses and include additional cavities.
However, if you are creating artwork for production by someone else, consult with that person for recommended specifications. This will help prevent future adjustments or additional fees incurred for proper cutting and weeding.
02. Full-color Print Transfers:
With these types of transfers, a full-color image is digitally printed onto vinyl and then cut around the perimeter. Appropriate thicknesses and number of cavities should be considered, similar to vinyl-cut designs.
However, a specific cut line also must be set up so that the cutter will automatically follow the paths or outlines of the different vector shapes to cut out the image.
For print/cut designs, regardless of whether they are vector or raster images, the cut line must include a spot color. The printer/cutter searches for the color name to find the outline to follow for cutting.

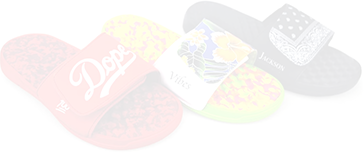
Boston based custom slide sandal maker has become $10 Million company using an online designer and unique growth marketing.
Read moreDepending on the preferred look for a print/cut transfer, you may need to add a bleed to your artwork. This is a color area that extends past the image’s edge so that when it is cut, white areas don’t appear along the edge.
The cut line should be set up to follow along the image’s exact edge, and the bleed should extend slightly beyond.
03. Dye-Sublimation transfer:
Dye sublimation is also a common method of transfer. Full-color pictures are produced by water-based inks and special papers utilizing inkjet printers. The ink transforms into a gas that binds to the material of the silk polyester or polymers of hard goods when spread with a heat press.
Unlike other transfer processes, where images are restricted to a certain size, dye-sublimated artwork can cover the product’s entire area, even bleeding off. the edge.
Because of the brilliant color produced with this process, full-color artwork is recommended.
Although you might use full-color vector artworks, true color, raster photographs, and pictures just do demonstrate most of the skills.
04. RGB vs CMYK:
When creating artwork for dye sublimation transfers, RGB is the recommended color mode because it uses a much larger color gamut than CMYK.
However, consult with your printer manual or the decorator to whom you’ve outsourced the work to find out if RGB or CMYK color modes are required.
Because this procedure requires an inkjet printer, it can be bandaged — thin white lines that result in ink not streaming from the print head because of blockage. Do not use wide spaces to avoid this.
Clear paint.-Strong material. Adding gradients and textures to the rigid areas of the architecture can tend to disguise the bandage.
05. Vinyl cutting with Heat Transfer:
Regardless of the type of transfer, pay attention to whether it needs to mirror the image. To be cut or printed in the proper orientation for application.
For vinyl cutting with heat-transfer vinyl or for dye sublimation. You need a mirror image so the artwork’s backside will be exposed on the carrier sheet or paper.
The transfer’s backside will be placed on the product when applied via a heat press.
On the other side, vinyl-cut transfers need not be printed/cut and are self-adhesive.
The face of the image on the carrier sheet reveals weeded and transmitted tape you need to pick up. It is the switch from the carrier sheet and sends it to the device it is supposed to use.
Regardless of the transfer type you use., Ensure creating artwork properly. And a better setup will help eliminate a lot of headaches. This will result in quick, smooth production and an optimal print.
Final Words:
If making artwork for dye sublimation transfers, RGB is the preferred color mode since it utilizes a far wider color gamut than CMYK.


